Website powered by

How to ask game dev tech questions?

General / 06 March 2021

There you are. Working dedicatedly and persistently until you stumble upon some issues. You look around and there is no help to be found. After all, you are probably working from home. You pull up your sleeves and you do not even search online for help, heavenly forbid you might solve the problem on your own! Even worst, you might waste your own time solving your own problem.


Rule Number 1

Search thoroughly online using short hand words, sentences and alternative keywords. Dig deep into QA forums of your topic. In our case, game engine topics.

Frankly, learn how to search for potential solutions. You would be surprised how poorly some people search online. So, if YOU happen to be the person to ask “Did you look online?” You should probably follow up with “How did you search for it online?”. Trust me, people definition of searching online is not the same as everyone else’s. Especially, if you have an academic research background you most likely do not define “I searched online already” as actually searching for a solution. No, a single attempt at looking on the first couple of links on page one does not constitute a complete search for a solution. If YOU are the person skipping this process then please understand that if you are not willing to do the work yourself first than others might not feel inclined to help.


You spend a few hours searching online. You realize this is not a new issue. You go through every suggestion that has worked and not worked for others. A few hours later you realize that even though some of them worked for others, none of them solved your problem. You grab the nearest utensil which happens to be a pencil. You are chewing it like Goofy did in the cartoon from the 80s. You admit defeat briefly and realize you life in the era of “every person smarter than you is somewhere online so let us find them and ask them a question before I break the nearest valuable item I possess”. And breeeeath. Okay, we are ready to dive into a community to ask for collaborative problem solving.


Rule Number 2

Do not ask vague and open questions with little to no information. Make sure you break it down and provide information on what you already tried.

Let us be honest. Most people ask questions like “How do I do X?”, “I have a problem and it is this”, “Do you have any feedback?”, “What do you think?”, “Can someone please tell me how to fix this weird looking issue?” So, what is the difficulty with asking such questions? First, if it is a common problem that you can search with a single search, you are losing points from anyone who knows you can search for the answer. It shows you are lazy or unable to problem solve simple issues on your own. So, if someone still helps you then you better be grateful for that persons time. Second, there is no information on what you already tried, so the person wanting to help has to spend additional time asking follow up questions as if they are your 24/7 customer support. Respect peoples time. Third, it does not specify specifically what you are trying to achieve. By explaining what you are trying to do can reduce the amount of questions and narrows down the possible reasons to your problem.


You asked your question. You decide to go do something else while someone solves your problem. You go surf around in social media and just chill. After all, why would you accept that you might have done a poor job at solving the problem? There can’t possibly be an alternative approach to your work. There is no way you can change your process or end result in another way, it has to be this specific way…right? Wrong.


Rule Number 3

While someone takes the time to help you out. Go look for alternative approach to your end goal. For example, what can you do instead of using A to get result X. Is there a B approach to get result X? There might be.

Do not go surf the internet, watch a movie or relax after asking for help. There is often alternative approach to getting your results even if one approach has many problems. This will allow you to learn more tricks for the future, and hopefully next time someone has your problem you could provide them with the other solution.


After a few weeks you have another problem. And you come back and ask for more help. People are starting to recognize your picture, nick or name. The person who always ask for feedback or help after a few days. You do not want to be that person. Does that mean you should stop asking for help? No.


Rule Number 4

Contribute to the community. I am sure you have some knowledge or answers to something that someone is asking online. 

Take time out of your week to help others. This shows you are able to solve other problems and not just receive help. This makes you valuable and a person of interest. So, do not just ask for help but give it too. Even if you do not know the answer, consider looking up the answer because chances are that person did exactly what you did…very little…even if the think they exhausted all options…which we have learned is not the case. So, join the cycle and learn how to ask a question and give help. WE have all been there but together we can break it and follow these simple rules.

Farewell. And do not hate the messenger.

Shit…Do I have extreme imposter syndrome?

General / 06 February 2021

Introduction

The Imposter Syndrome was first described in 1978 by a group of researchers and was noticed to be common among both men and woman and age group. In other words it has been known for awhile and there are numerous research tackling this mental conundrum which apparently affects between 9% to 82% of people according to another research paper.

So what exactly is imposter syndrome? Or what are the signs to look for?

According to research it is an individual who struggle to accept their own progress or success in life. They have a sense of self-doubt and fear of being exposed as a fraud. They would often give credit to luck or others who helped them rather than accepting it is their own intelligence or skills. It unfortunately goes deeper than this. In more extreme cases the person might fear not meeting expectations, overachieve or even self sabotage themselves. This is very apparent in professional settings. In fact there was a research paper that says it seems to be highly prevalent and intense among high achieving women. That said half of other studies suggest there are no difference between the gender.

There are in fact over 60 studies and a high interest about imposter syndrome all over the internet but no clear treatment for it. Most of the articles suggest how to manage it and reprogram your mind to deal with the feeling of being fraud. Those research mention how imposter syndrome is prevalent among ethnic minorities, that it declines with age, burn out, job performance reduction, job satisfaction and increased depression and anxiety.

Despite the fact that a lot of people have the imposter syndrome and the proven evidence of how it can affect a person mentally, it is not considered a recognized psychiatric disorder. Last I checked, it is not featured in the American Psychiatric Association’s Diagnostic and Statistical Manual. It also not listed as a diagnosis in the International Classification of Diseases, Tenth Revision (ICD-10). Despite this Psychologists and others acknowledge this is a real and specific form of intellectual self-doubt that can lead to anxiety and, often, depression.

The scientific signs

Do you have people who considering you this? Perhaps skilled? Talented? Successful? Did you ever feel you did not deserve the acknowledgement, praise, academic level, promotion or just success in general?

Perhaps you have experienced the “imposter syndrome”? According to Caltech Counselling Center the definition of the Imposter Syndrome is a psychological phenomenon “a collection of feelings of inadequacy that persist even in face of information that indicates that the opposite is true”

So why do I think I might have a high degree of imposter syndrome? I do not necessary lack confidence in my areas because I openly spam everyone about it. That suggests I should not have imposter syndrome? But contrary to the public display you probably missed a few clues. Let us analyse myself using The Imposter Cycle based on Clance (1985). Hopefully it will help you too.


The imposter Cycle starts with some type of achievement task which leads to anxiety, self doubt or worry. This leads to either procrastination or over preparation etc. This after feeling of relief and positive feedback becomes ignoring the feedback. This then leads to self-doubt etc.

Interestingly enough the repetition of success increases the issue rather than breaking the cycle of imposter syndrome. It is suggested that it is connected to failing if they do not overwork, their high expectation for their goals and own concept of ideal success. An imposter will ignore their own success if it is not according to their performance and ideal standard. All very true in my case. The fear of failure which tends to make them overwork. Also true for me.

In fact, research suggests (Clance 1985) that imposters secretly want to be the very best compared with their peers. Imposters are often successful early in life, especially in school. Also true in my case. In fact, it is not until after University they realize the amazing people and talents that actually exist, and they are not special. This results in them dismissing their own talent and conclude they are not really smart after all. Also true in my case.

My personal signs

After seeing a lot more people openly talk about Imposter Syndrome I started doing scientific research on it. And then I broke down my own life style, actions and choices which led me to conclude that it might be connected to imposter syndrome. Perhaps, a more extreme form.

Here is open but brief summary of what my self-analysis informed me about.

I have not one vocational degree. But two. I have not just a Bachelor Degree. I also have a Master. And I am secretly (not anymore) doing another master. I also have about 200 certificates to this date. And I have paid people to teach me stuff I already know, professionally and successfully done myself.

Why would I do that? Because I do not believe what I have previously achieved was my own doing. I do not think I am good enough. Despite practically, professionally and successfully doing things both career, entrepreneurship and academically.

I have changed career several times out of fear that I am not suppose to be doing it, that I am not the right person or because everyone else around me are better than me. While I am doing these things successfully by any normal standard. I am overworking myself. I am overachieving. Always.

Why would I do that? Because I feel like a fraud. I do not want to fail others. I want to be the best. Then I see someone better. And I put in the hours to not be seen as a fraud.

I have paid 100 000 thousand dollars to learn from others, despite having done it myself. I have paid thousands of dollars to have someone else show me something, despite getting comfortably paid to offer services myself.

Why would I do that? I think it was just luck. Luck that I got a contract. Luck that I got paid that well. Luck that it happen. It was not because I worked hard for it, sacrificed for it or went over and beyond to achieve it. No, it was not me. It was the person who helped me or luck. So, the more success the more unsure I get, the more afraid I am, the more I think I am fake and so I invest more into it to prove that I am not.

I get burned out because I do a lot, and I spend a lot of time doing it when I know others might do it for less. I will over prepare. To perfection. To the point that it has opposite effect. To the point that I even will post it online that I am either behind schedule or putting in a lot of hours to prepare something. So, I wake up earlier to make time, to keep up and not be the “imposter”.

Why would I do that? I think you get the idea. The list is pretty long of actual things I do, life style wise, daily and for most of my life that connects to the imposter syndrome. However, most people feel it I act on it to the extreme.

I normally do not write such personal things but I know Imposter Syndrome is a wide spread thing, and people who have it feel they are the only one who have it. So, I hope it gives some insight onto your own actions and how it connects.

Do not worry. Since then I have managed to let go a bit, okay with failing, comfortable not being the best and perfectly flawed. Maybe…kind of….erm..we will see.

Free Guide here https://impostersyndrome.com.au/index.php/the-free-guide/

How To Do Lighting Art Test

General / 11 January 2021

I do a lot of lighting pitches to land client, work and contract and think it is useful for students and junior to see how they can land it. I hope it helps to read this and if it is useful, please leave a like and comment.


Lighting/Level Design for The Caretaker

General / 27 November 2020

I originally did the lighting for this game in Unity around 2016, and it was terrible result back then but it was my first commercial stylized lighting. Since then the company has been wanting to port, expand and improve the game. I was therefore asked to relight it again, since I obviously improved a lot by then. And since then I had also learned to use Unreal Engine. So first I would like to show what I did in 2016 in Unity Engine.

Basic Progress Report

Unity 2016

Below is how it looked like for the Unreal Version when I got the project.

Unreal Early 2019

Below is the first draft where I figure out the placement, technical limitation and issues that can arise by placing out light sources with custom lighting setup.

Technical analytical round up until Mid 2019

Once I realized I needed more colour and a different level design to put it into practice, I was allowed to change the level design enough to improve the lighting even further. However, I needed to test out different colours in case I wanted fantasy fire.

Made higher openings on roof and expanded hallways a bit.

In the image above you can see I am trying to decide on the ratio of the light, the colours and expand the level design to support the vision.

Created elevation that went up in some key places

In the image above you can see that I thought straight corridor needed to be broken up a bit, so I added some dead end rooms that went up.

Kept the high ceilings in specific places around the level

In the images above you can also see I am avoiding skylight and instead opting in for manually adding bounce lights.

Tested the different lights and range

In the image above you can see I am checking exposure to get an idea of how dark I can push it, and how big the dark areas can be before it disrupts gameplay. I eventually got an idea of the base lighting, level design and mood I wanted so I started pushing it for the first dungeon. I also added vents and magical green glowing lights to walls. Below are some changes to the lighting on the last iteration.

High ceiling has blue light while ground has orange yellow
The range of the torches are limited to allow for dark transitions
Making sure that torch light bleeds out a bit in the darker area and allowing blue light to bleed into the torch light areas a bit.
Creating bright, dark and bright lighting flow to lead the player.
This is one way exit from top once you walk up. It is dark to be a bit unsafe.
This is one of the larger I put together and is also one of the brightest areas.
I created an area that went down to break up the patterns a bit.

So far the above images are for Dungeon 2 that could use some more work, so I will quickly show you images for Dungeon 1, where I established the guidelines. And also why I started adding elevations and brighter areas in Dungeon 2. Part of it is to keep player interest.

So, you can see the changes that has happen both in terms of level design and lighting. Where I also use fog to create the depth and mood needed. But let us explore a bit in detail why these choices are made and what are the limitations here.

Technical Limitations

Originally there were real time lighting on the torches, and they were placed pretty close to each other. That means it was very expensive. Too bright. And no bounce lights. To deal with this I created a default torchlight setup with a specific intensity and range, which I could tweak individually if needed.

You see two lights now doing the job.

Point light is set on static to create enough fill. The spot light is set on stationary to cast shadow when items are spawned randomly in front, and on the spiders climbing on top. Together they create the minimum I need for illumination around the torch areas. However, I had to carefully test and place those lights to avoid overlapping lights. As you might know the overlapping stationary lights become either real time or static (I forgot), when there are 4 of them overlapping. This resulted in a lot of work and thought on where to place the lights, and how to create the desired effect and mood. This also made everything too yellow, so I created a higher roof with exterior blue light coming in to balance things out.

I used rect stationary light and emissive box to create the blue lighting.

As you can see in the image above I created a larger ceiling and placed those near doors, corners or half way through the corridors to break up the yellow dominant light everywhere. This is expensive so I tried keeping it within a certain range. The reason for that is because for Dungeon 2 the areas are sometimes bigger, more corners and thus more likely to have overlapping lights coming through the wall. To counter this I reduced some of the ranges and added fake lighting. Whether I keep it is another test for another time.

Dungeon 2 has static lighting to help spread light further out.

As you see in the image above I have more static lighting in the bigger dungeon to deal with the stationary overlap limitations. And you can see I utilize it to push more light into the darker areas of the hallway, because I had to cut down the range for the lights.

This is the other side of the image above and its stationary light.

What does it mean? And why is this important? If I kept the original stationary light there would be around 6 overlapping lights thus forcing me to go either to real time or static. The other solution would be to move the lights around. So the solution for now was to add in fill lights manually.

This is stationary overlapping lights. Green is perfect.

As you can see I have manage to optimize the game cost by keeping the amount of real shadow being cast to minimum, and overlapping stationary light within green. As discussed earlier the seemingly innocent looking lighting job required some careful thoughts in optimization while developing the look for it. Further more I had to ensure that the real time cost around the map stayed out of red. We can see that using lightmap complexity view below.

Blue is super good, green is good and red is bad!

In the above image you can see red occurring due to it being close to the starting area, which has a big fire pit and particles.

Considering the amount of light in this room this is fairly optimized.
Similar to the first image but away from starting room.

As you can see the reason lights are placed the way they are, the level is designed the way it is and the thought that has to go into such a straightforward game is in fact a bit more complicated than simply dragging out lights. As for Lightma^p density I have kept it within green as seen below.

Lightmap Density

I hope this article showcase some of the important mindset and decisions that goes into lighting. Sometimes things might look straightforward and you might think you do not need a lighting specialist, but I improved the visual quality and frame rate using these methods.

Game Lighting Practice 4

General / 22 June 2020

In this test I am testing out how to light and lead the player for a multiplayer type of map. For multiplayer map you need to focus more on readability around the map but also the characters moving around. Since I still do not have my graphic card it gets difficult to do too much intensive work.

Frontal area of the map showing brighter side on left and darker side on right

Right now I decide on the colors I want first before I pick the HDRI sky and generally the time of day. So if I want more yellow and orange, I know my time of day is earlier or later in the day etc.

You can see the two colors I focused on for the color palette.

I decided to have one side identified as the brighter area and the other one in the shadow. So for that the light from the sun was coming into the left side.

The bright area tells the player which side they are on or going towards.

As you see the lit side is easily identifiable. So I allowed the purple to dominate more on the shadow side.

This part could use more contrast as it does get a bit flat. The idea is this is the shadow side.

The shadow side as seen above is dominated by the color purple. And does perhaps become flatter than intended. The overall values are okay in some of the other areas though.

You can see the different in values where it is darker on right and brighter on left.

Even though some areas as inaccessible I wanted it to feel bigger. For that reason the blocked areas are lit up a bit.

Brightest area is in the middle under the dome. Inaccessible area to right has light.

You can see in the image above that the brightest area is under the dome by the bridge, to encourage people to go there. And there is a contrast with the background that is dark on the right, where the players can not go. The light in there does however give impression of scale and something going on outside of the play space.

The basement area is the darkest and hardest to read players.

The darkest area is under the map and also where it can be hard to spot the players, but for now it is readable enough. This area is darkest so players will know by the layout, design and lighting where they are. Overall it could use more brightness and contrast to deal with the flatness. To show this I have recorded a short video running around the level with and without color in it. The character and weapon are not working in the lighting right now due to capsule shadow bug.

Play test with color and black/white

Gameplay Lighting Test 3

General / 07 June 2020

Since I still have not managed to replace my graphic card I continue to focus my time into gameplay lighting and color palettes. This time I went with the epic games tower defense assets relighting session. With this decision I decided on a joker and batman color palette of green and purple being the dominant colors. Let us investigate what I ended up with.

Location of lights and reflections

As you can see from above I did not use a lot of lights. And the only lights that are dynamic are the ones near the path. Those are the purpose lights. Everything else is baked.

Lighting setup without text

As you can see from above it is fairly lit, perhaps a bit too much and not enough contrast.

Some dark areas but still flat and eyes in statue not good enough

Here you are able to see some difference between the path but it is generally flat, this can be fixed but increasing brightness of path light or/and decreasing skylight to be darker so overall the scene is darker.

Small contrast between light sources

There is a bit of darkness in the corner here due to removing a light source but the statue is still overly bright with odd green light coming through the eyes.

I tried establishing more mood, depth and atmosphere by using fog. I primarily wanted the acid pool under to get more of a glow through the fog. You can notice the evenly lit path at this side of the map.

More contrast, more stronger light and more stronger fog.

Above you can see I reduced the skylight a bit to darken the scene, pushed fog to be stronger under the acid pit, increased the light on the path and took away the statue light and pushed the green out from the eyes a bit.

How it should have been

The above image is just a quick edit on how it should have been with clearer light and dark areas. That said I think the color palette worked well this time around. Below is a short video testing the level but since I do not have a graphic card it lags a lot.

In short, I used an hour on this and would need more time to get the contract between dark and light areas more obvious. Overall I am happy with the color palette but could have tried some yellow golden on top of it.

If you like these posts then please leave a comment and like.

Gameplay Lighting Practice 2 #whatwentwrong

General / 02 June 2020

Due to not having a graphic card I am unable to use a lot of lights. For that reason I have been playing around with game-play lighting and color palettes more actively. These are unfinished pieces done in a few hours. The rules are simple. Try and light something in an hour and then share what could be better. That means there might be some self critical pointers on what I could have done better. #whatwentwrong Since I really dislike this piece I am being fairly short this time to share the thought process and experiment. These blogs are about being honest and share the critical mind that goes into creative work.

Reflection probe, sun light, light portal and shadows

In the above image you see the lighting view where I tried getting some interesting shadow coming into the area. Since the player is starting here and need to be directed to the other side of the room, I kept the furthest area darker with more blue. Although this area could have been more gradient and variety, as it is kind of flat here.

Locked door, fill light to tree, decoration blue light in background, shadows

In the image above you see the locked door that the player will notice, if the player goes to the very bright orange red light area then they will realize it is locked. Hence a darker red color over the door. But still bright enough to separate it from anything else nearby. Although, this area might have too strong direct light as it is clipping a bit.

Cool lighting versus warm lighting, darker shadow area, room to enter

In the above shot I translate the dominant orange into more blue and higher contrast. I tried making it clear that I want the player to go this way into the room. I also tried having some interesting shadows. Although, I do have reflection issues here.

Warm versus cool on both side, reflection probes, shadows

In the image below you see specific reflection probes and no fill light being used. It does have a nice transition from bright, dark to bright. Although, I should have added accent lighting on top and background to inform player about the origin of the warm lights to the left. And I should have boosted the warm light from the left.

Blue light, reflection and button to push to open door

In the image above you see the two lights being used. One up close to the light fixture and another one to push the light with shadow out to the hallway. Although, it could have been more interesting to place it on the side to have interesting shape to the lighting.

Flat by the archway, need more gradient and shadow

As you see much clearly on top image here it is fairly flat in some places, it could use gradient by blocking out light from one of the window.

Blue tree to create contrast with orange light. A bit burned out light on walls.

As you see in the top image it ended up too bright on the direct light. Commonly known as clipping the highlights.

Reflection issues, need more fill light on tree

As you see in the top image the reflection is not working correctly, so the metal objects are almost black. I also do no like the lighting in the end around this area. Probably the least.

Light could be on side to create gradient. Overblown on the floor.

As you see in the above image it is fairly boring back at the wall and the highlight on the floor is clipping here too.

Probably best shot but needs more orange on left, and prop orange lighting on roof .

As you see in the image below it is probably the best shot of this gameplay lighting practice. Although, I could use orange light on the roof, by the plants in the back you probably do not see and stronger light on the left going further up the wall to build the mood better.

That is about it. I hope you like that I share imperfect and unfinished pieces and discuss the reasoning but also what went wrong. If you like this please leave a like and comment. Thank you

Color & Gameplay Lighting

General / 18 May 2020

Since my RTX Graphic card had a breakdown I am using motherboard graphic card. This mean I am limited in how many lights, reflection, volumetric fog and texture memory it seems. It was lagging a lot so I could only take a few shots before putting it aside. That is why I mostly focused on color and gameplay lighting to lead the player.

I obviously picked a sunset HDRI and reduced exposure. I added sky light with dim blue color and directional light to have orange color.

In the image below you see I have short range point lights for the fire brazier. Reflections close to metal and another reflection to cover larger areas.


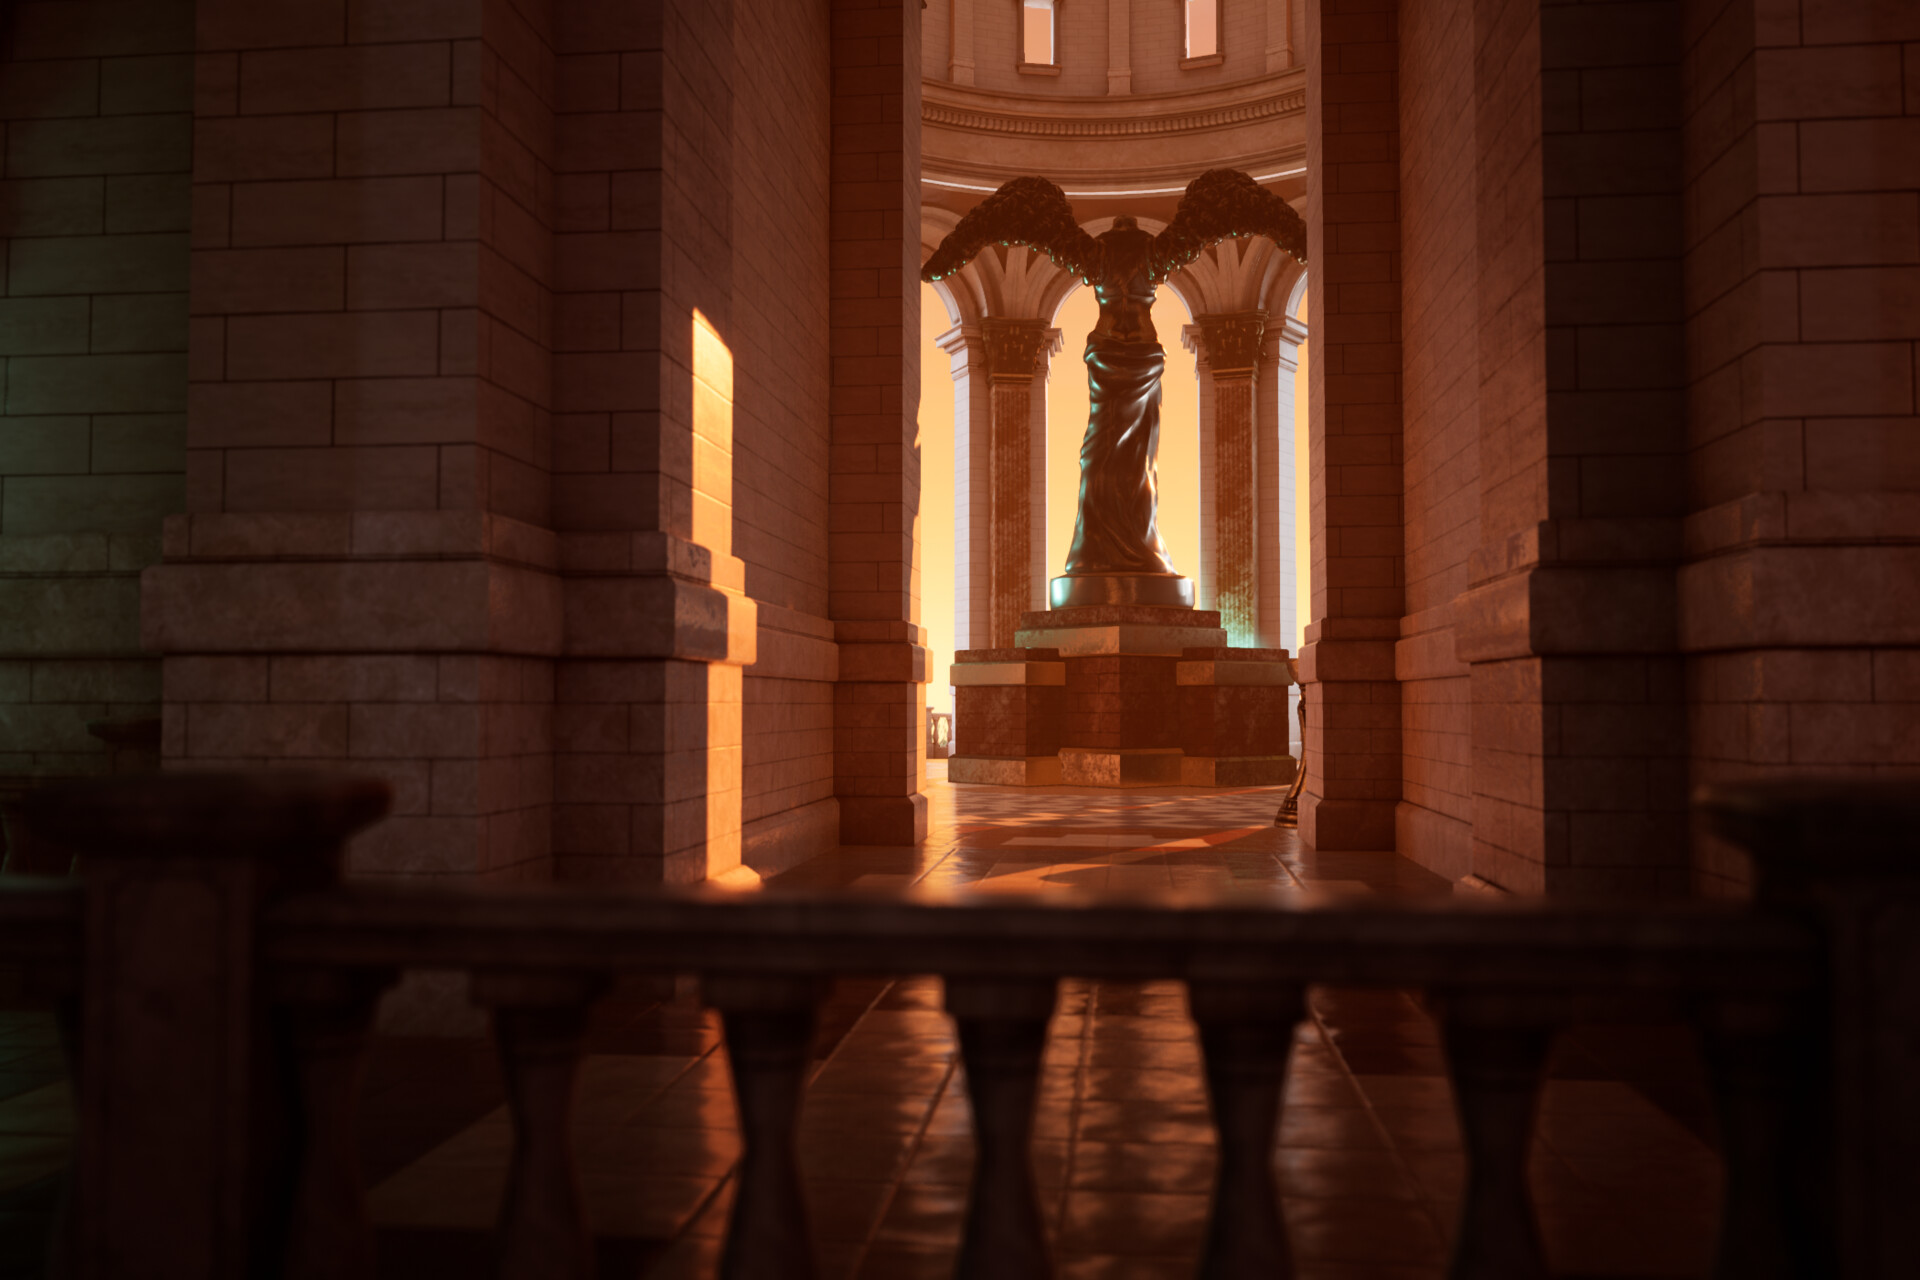
In the image below you can see a single reflection probe at player height in the hallway. You also see the only fake light near the statue to create teal tonal value on the side of the statue for style, mood and shaping. Lastly, if the player was coming from that direction you see the sunset light directs the player into the hallway.


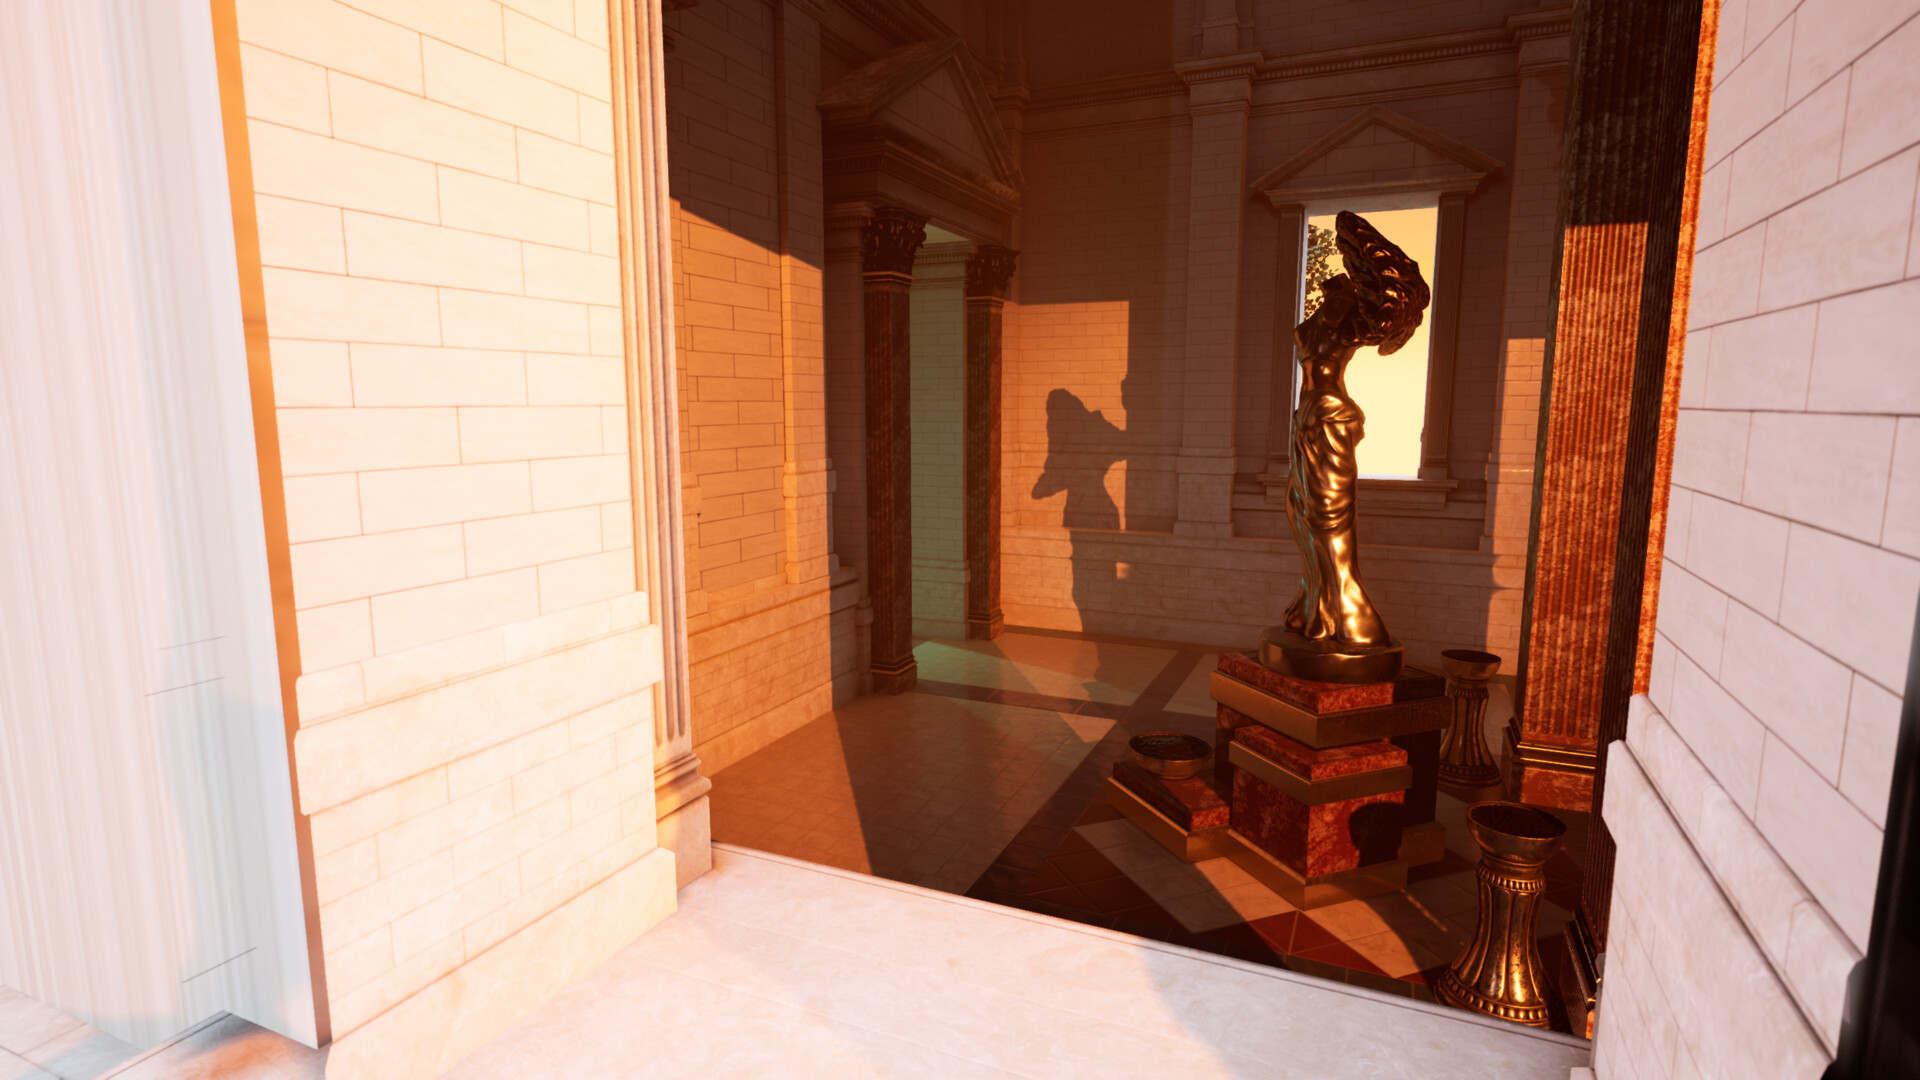
 In the image below you see brazier flame placed to the right of the player when coming from outside, reflection probes to deal with the metal close and far. And you see the only fake spotlight to light up the statue on the side from this direction. Here you see the brazier being the brightest path to encourage the player to walk on this side of the room.


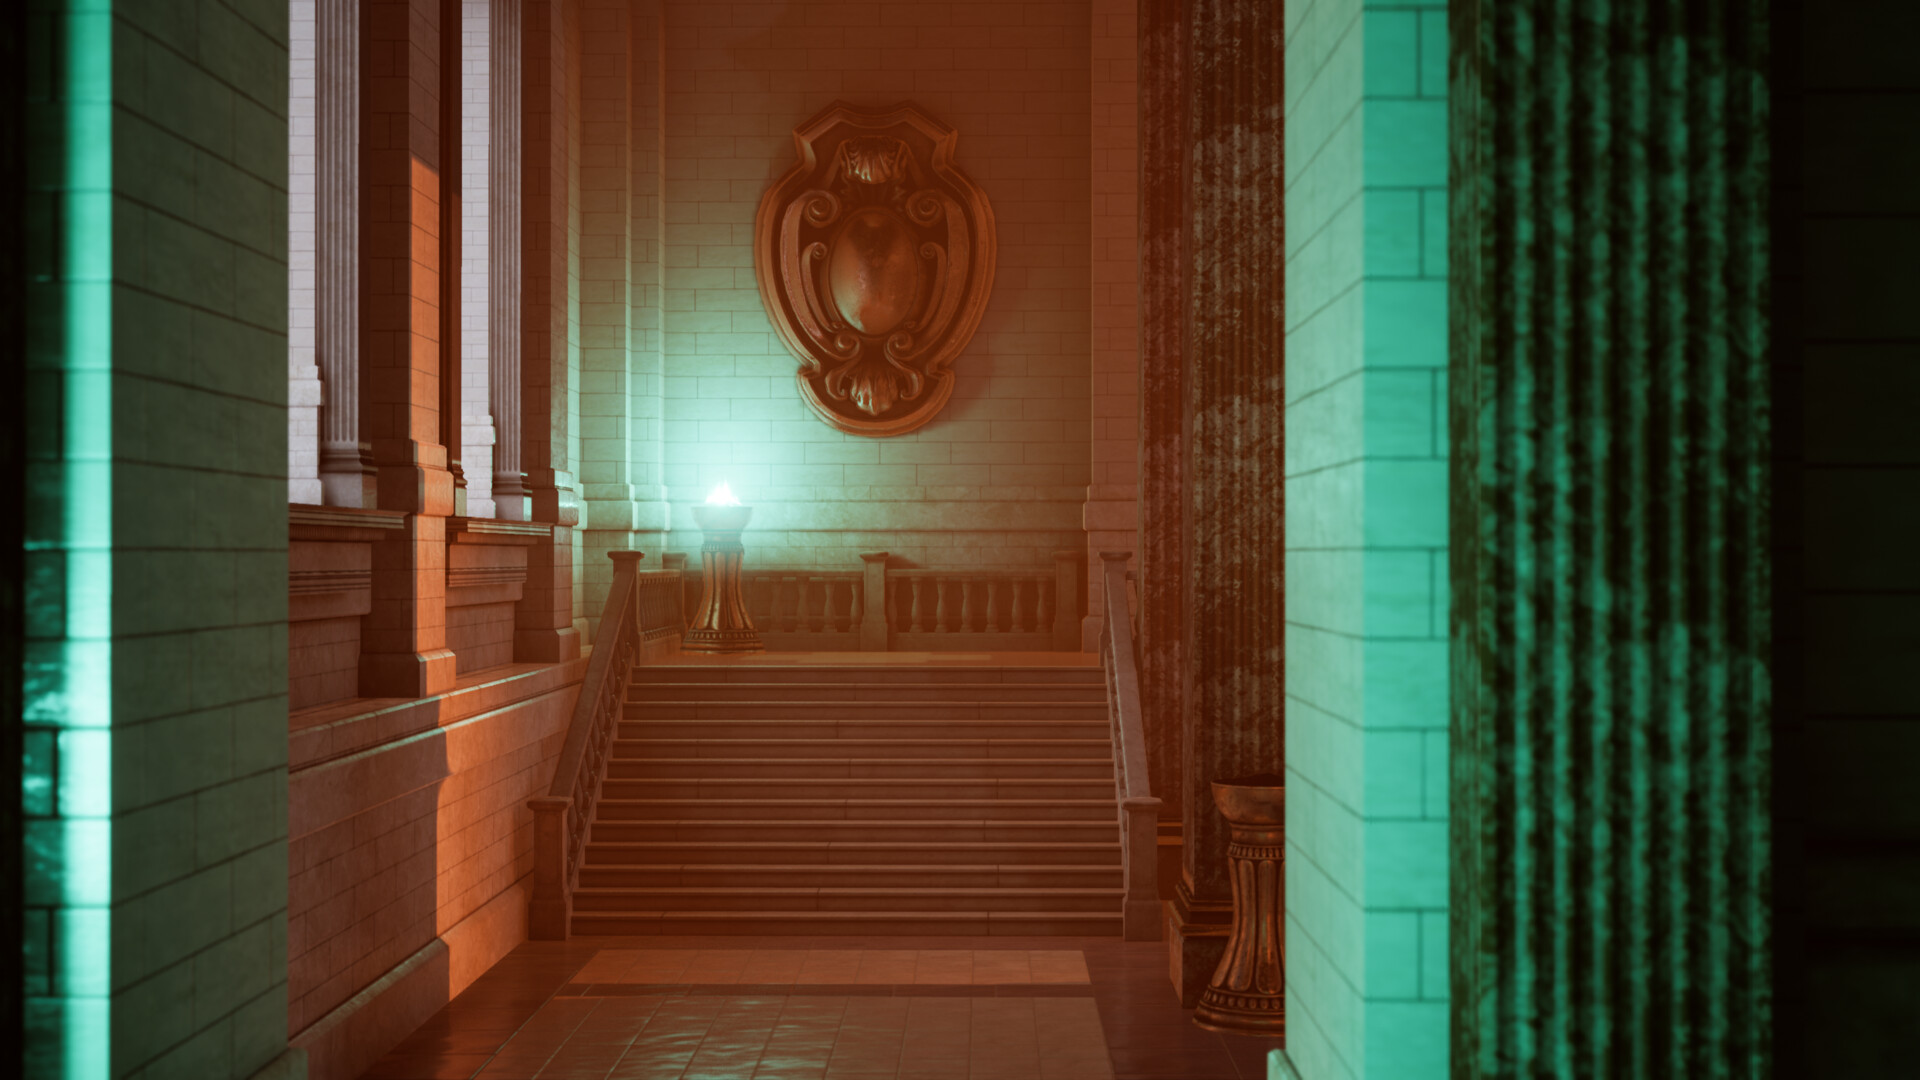
In the image below you can see the side player will look at when standing at the spot on above image. As a player you will see an interest shadow cast from fake spotlight from outside to replicate sunset in this part of the level, and green light coming out from a fake spotlight in the other hallway. The idea is to frame the teal color between two strong sunset from the window with shadow from the statue. The other side is in darkness. Again, to keep the player moving a set direction.


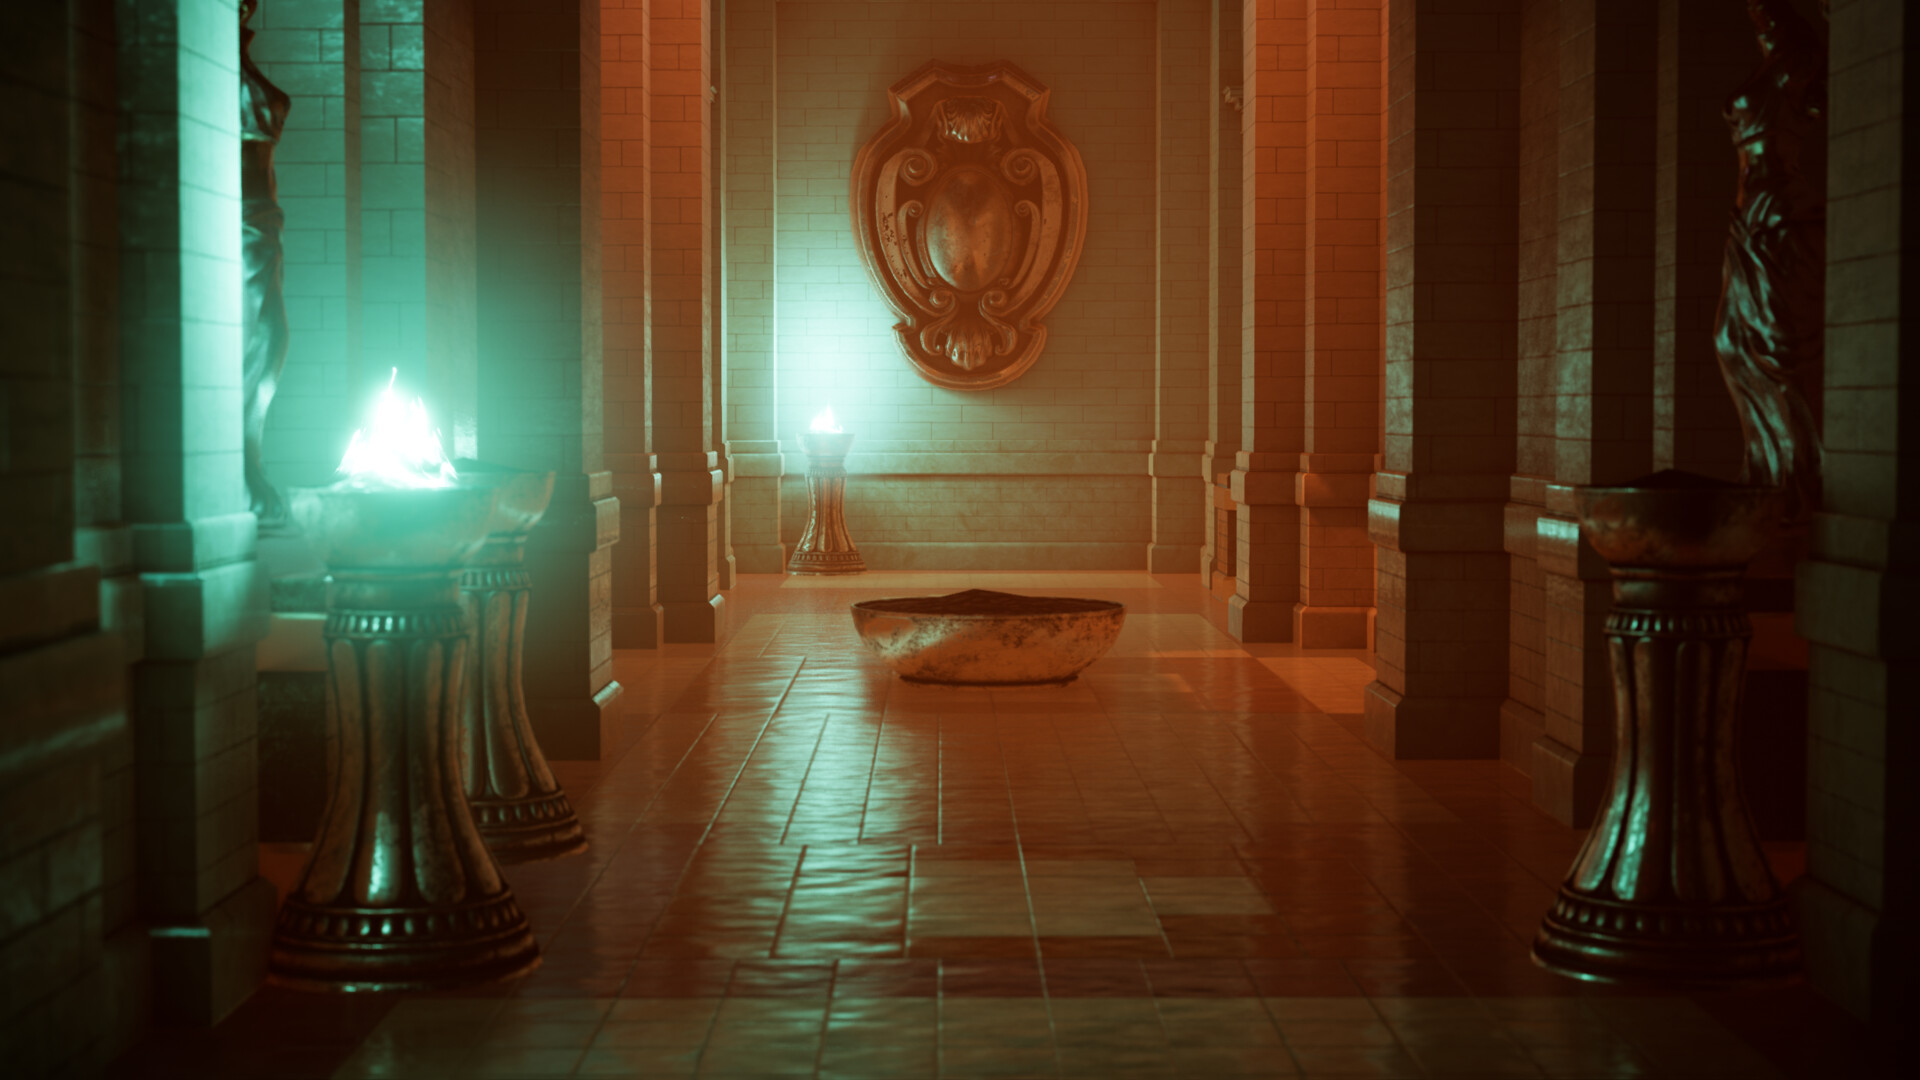
Here you see what the player sees from the directions above that is bright and compositional leading lines and shadows into the right side of the hallway, in comparison it is dark on the left side. Making it uninviting.


Finally the player reaches the final area and the only fake interior light here is the spot light at the end to fill the room more in green, to create contrast there is a window on top left that I created to fill in more of the sunset in the middle of the room. Creating a teal, orange and teal pattern using light, dark and light method. Since there are more reflection objects here there are smaller reflection probes closer to the items and bigger reflections to cover bigger areas of the hallway.


If you liked this please leave a comment and like. Thank you  

Lone Traveler - Lighting Breakdown

General / 05 May 2020

The first thing I did was to look for different references or moods that I want to try and light.


 I ended up picking the one I could replicate in terms of level layout. 


I went ahead to experiment with my own ideas first to let the creative juice out, so I could later make my own version. At the very best the below image felt very sci-fi and game like.


I tried different material settings, props, visual storytelling but it lacked real mood, story and visual punch. So I decided to get closer to the reference before adjusting it according to issues my scene has, for example the tilted windows and longer walls. Just to make it more my own. So I replicated the reference first.


 I was not necessary unhappy by copying the reference but I wanted to interpret it and turn it into my own version. During this process I had placed out the seats, sitting animation, light sources and other props. So the above image was fairly close to the reference. So I will explain the changes that occurred after this part. 

Starting with the directional light with slight angle and low temperature for color. I then adjusted the emissive blue lights and did a test bake of the directional light.


After reducing the lightmass settings down for bounce skylight and indirect lighting I moved on to the skylight. The sky light used a sunset HDRI for the desired burned out look. And it was kept on low intensity since this is still somewhat in space. I was mainly looking for subtle reflections and details.


I then decided to keep the blue lights stylized for the intended mood. Which meant I would not respect PBR exposure of 8EV for this interior. Instead I adjusted the right top lights to be dimmer. The middle top lights to be brighter. And the bottom left to be bright enough to create bounce. This was somewhat because I liked the reference blue lights effect. 


I then baked all of the above to get an idea of the general mood together.


I then added some mood lighting for exterior to brighten it up so the bright light that would come made more sense.


Next I needed to bleed in stronger area lights from the windows so I added light mass portals to all windows, and area light to the three right windows.


I started playing more with different camera angles and I added frontal light and back light to the character to enforce it is as focal point for this shot.


The next step was to add reflection, fog and other details to enforce the mood.


I then started with the post grading to establish the desired mood more.


To get the desired effect I needed to change exposure and EV settings.


I also needed to increase the lightmap resolution.


And then with overall tweaks I started playing around with other shots for final render.


And then I wanted to have fun with the shots by presenting it differently.
So there you have it. I hope you liked it. 

Sub Roles of Lighting Artist at Ubisoft

General / 26 January 2020

Image used in featured image is by Cottonbro

In case you didn’t know there are sub specialist within the growing lighting artist career. That means they are often focused in one area of lighting such as game lighting, dialogue lighting or cinematic lighting. Each of these also has their own sub group but the person deals with it themselves, not another person in the other department. At least in Ubisoft case.

Game Lighting

Photo by Suludan Diliyaer

In Game Lighting you generally light the game based on where you put the light sources with emphasis on gameplay. You generally have to think about the optimization and frame rate more than the other lighting artist in the other areas. That often means you can’t have that nice reflection or shadow. It means you can’t have too many lights close to each other, or have their range overlap. I am simplifying the challenges but a lot goes into game lighting. Since I mostly do real time lighting with GI and 24/7 it makes things even more challenging. That means I need to check how the light affects everything throughout the whole day. It gets even more complicated if the player can shoot the lights, now I have to check what happens during less light.

Dialogue Lighting

Photo by Jonathon Borba

Dialogue Lighting comes in many phases and groups. In short it means the player is playing the game and entering a dialogue, those dialogues often have their own lighting. A common lighting is three point lighting. Since this occurs at specific events such as missions, it also happens during 24/7. In other words, you need to consider the light the game lighting artist put in, and the light dialogue put in. You then have to disable, add or adjust your own lighting to ensure the frame rate doesn’t drop but the characters are nicely lit. In my case the sub tools for this process is different than the main tools for Game Lighting. In other words, I use some unique editor and properties to do this type of lighting.

Cinematic Lighting

Photo by Elijah O’Donnell

Cinematic Lighting also comes with its own sub groups such as in game cinematic or recorded cinematic. In this case you would generally clean up the lighting from the game so you start blank and light up your own believable setup that works with the environment. Like all of the lighting roles here you generally keep track of optimization as mentioned during Game Lighting. However, in my case the fps can go lower and I would have more freedom to place out fake lights in comparison to Dialogue Light which might have 1-2, and game lighting which generally has 0 fake lighting. When I say fake lighting I mean additional lights. In this context for me anyway, we also use a different sub tool to handle this method of lighting.

Conclusion

I would say they all use principle of lighting, color, composition and storytelling but there are different restrictions and methods in doing so. So, having the basic non-technical knowledge about light, color, composition, framing, leading lines and storytelling can go a long way.

Do you want more?